
Digital I/Os
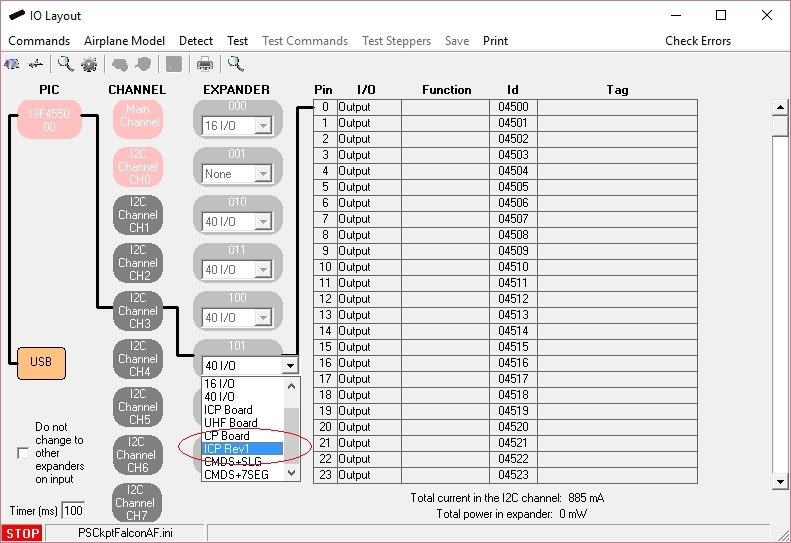
To configure the PS Cockpit ICP Rev1 panel just select ICP Rev1 Board from the Expander pull down list in the IOLayout page of the PS Cockpit Software at the correct I2C channel and expander configured in your ICP Rev1 board (see PSCockpit Quick Guide V.4 – ICP Rev 1 PCB):

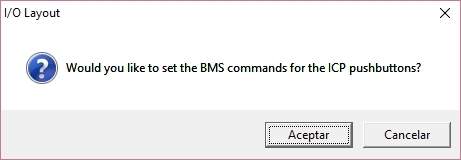
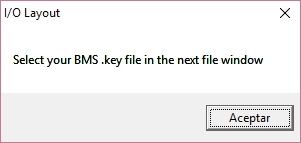
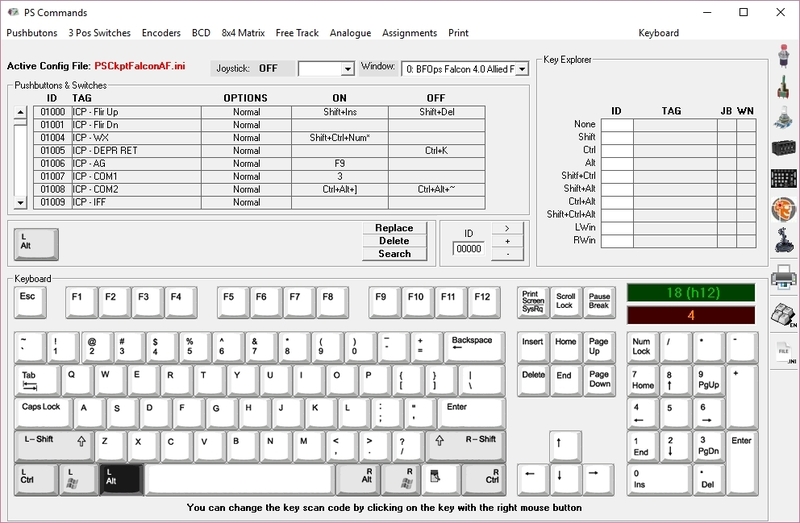
If you accept, the software will prompt you to search for your BMS .key file and will automatically search for the key strokes you have set in your .key file for the ICP:
Once the ICP panel is already configured you can modify the list of inputs/outputs as desire as well as the free I/O of the expander:
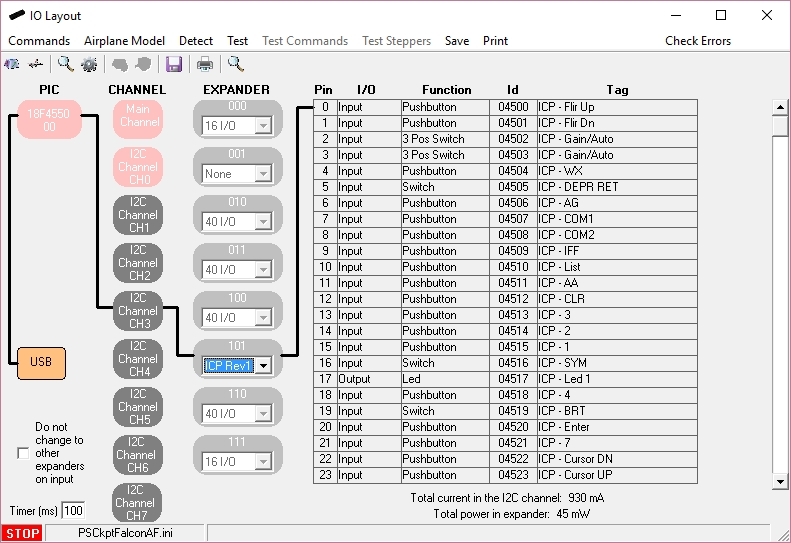
Be aware that once the configuration is saved, whenever you enter the IOLayout Page you won’t see “ICP Rev1 Board” label on the expander anymore but the 40 I/O label.
Analogue inputs
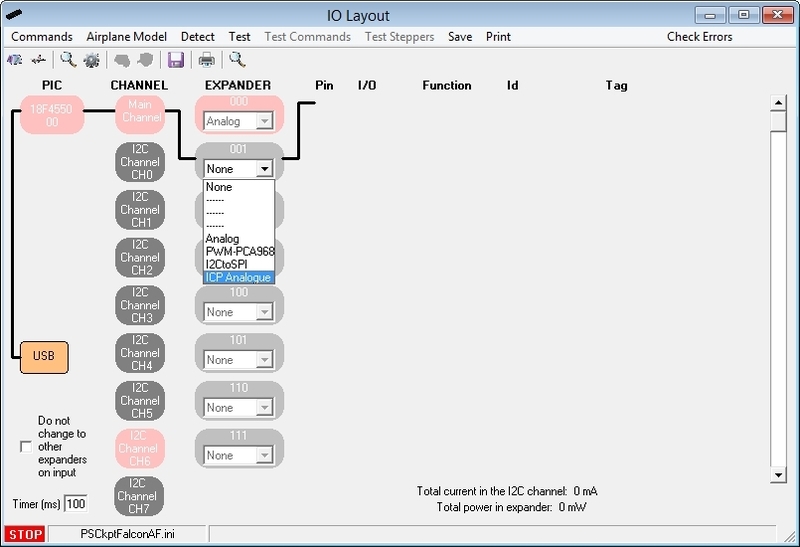
You have to repeat the process for the analogue inputs by selecting “ICP Analogue” in the I2C Main Channel:
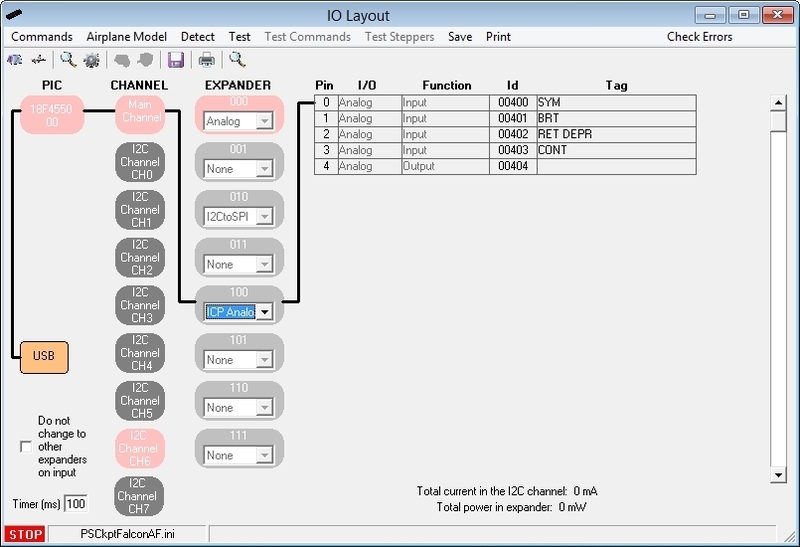
The expander will be configured as shown:
No comments:
Post a Comment