- Using (4) 7seg. displays.
- Using (3) 7 segment displays and (1) 14 segment alphanumeric display
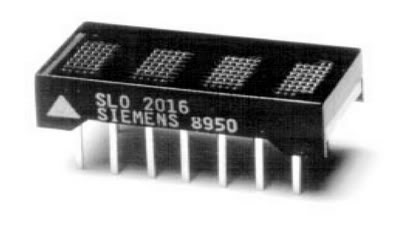
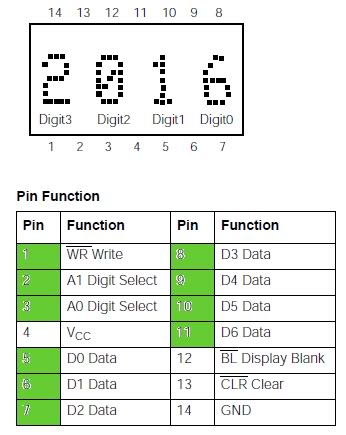
- Using 4-Digit 5x7 Dot Matrix Alphanumeric Intelligent Display SLG2016
And the last option, only for the Aux Comm Tacan Channel, using the Cherry pushwheels.
Option 1: Using (4) 7seg. displays.
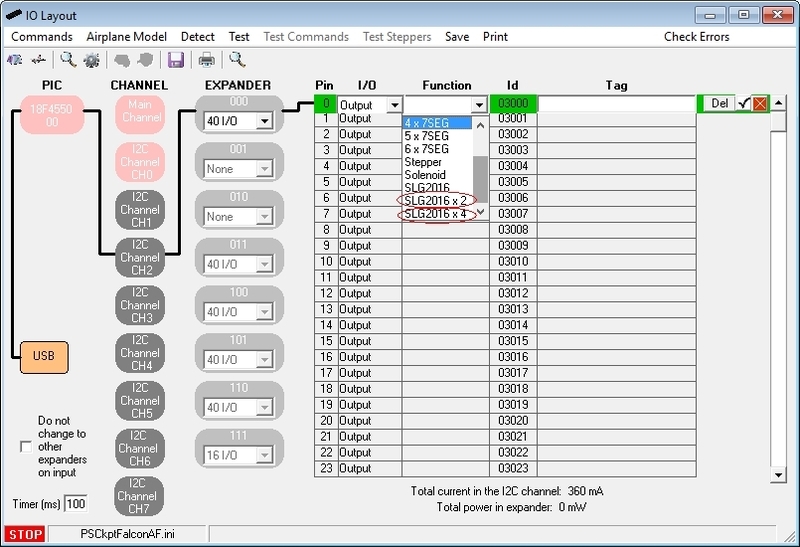
Configure your 7s displays as usual in the IO Layout:

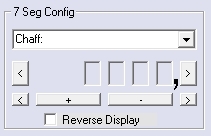
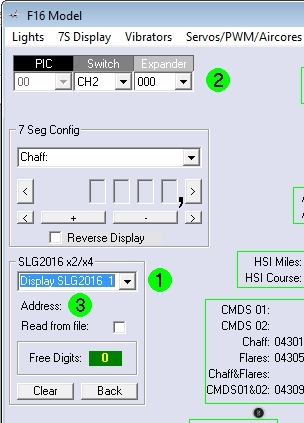
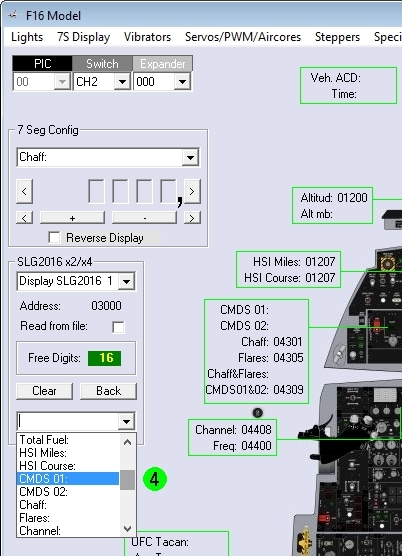
Select the correct Id in the F16Model page by clicking on 7S Display and make the configuration of your 4 digits as shown in the picture:

Now, when you run your sim ,the PSCockpit software will display the Tacan channel in the first 3 digits of the display and the last one will show a 0 when the band X is selected in the sim and will show a 1 when the band Y is selected in the sim.
Option 2: Using (3) 7 segment displays and (1) 14 segment alphanumeric display
To use this option you must try to get 14 segment displays with the same dimensions that the 7 segment displays, the same colour and the same brightness. This could be difficult to find.
Remember that all segment display have to be Common Cathode as well as the 14 segment display.
I have found the Kingbright PSC39-21GWA is a little bigger that the Avago HSDP-7803 and probably can be use it. But, sorry, I didn’t try it.
As before, configure your 7s displays as usual in the IO Layout, this time using a 3x7 Seg. Display.
Now we have to connect the segments. We are going to use to a 5VDC power supply. To limit the current to 25 mA we will use a 120 Ohms resistor. This resistor can be change a little 80-160 Ohms to get the same brightness as the rest of the 7 seg. displays. The wiring will be the following:
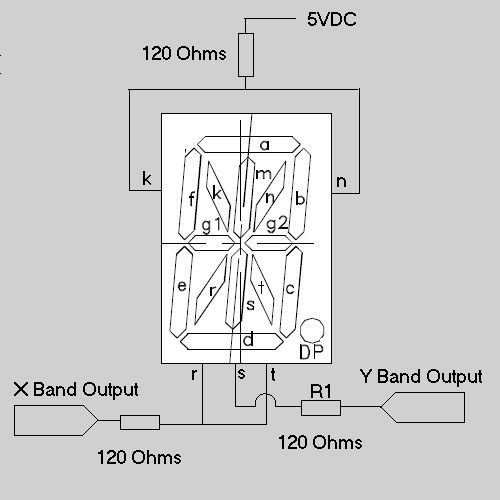
The resistor R1 might need also some adjustment to get the same brightness as the others.
Now, if we activate the X band output, will see an X on the display and if we activate the Y band output, will see and Y on the display.
The X and Y band outputs can be selected on the PSCockpit Software in the F16 Model page (Lights) as shown in the picture:
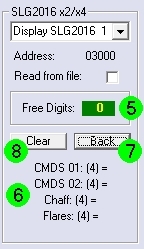
Option 3: Using 4-Digit 5x7 Dot Matrix Alphanumeric Intelligent Display SLG2016
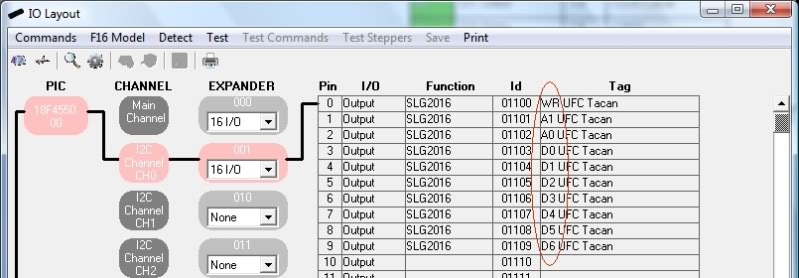
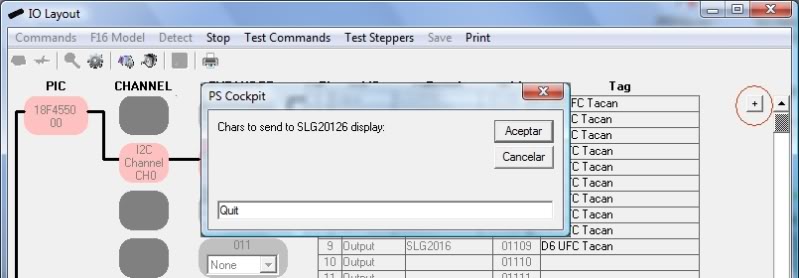
Proceed as a normal 4-Digit 5x7 Dot Matrix Alphanumeric Intelligent Display SLG2016 like explained in the following post:
http://psfalcon.blogspot.com.es/2012/08/how-to-use-5x7-dot-matrix-alphanumeric.html
Option 4: Using Cherry pushwheels.
The Cherry pushwheels are selector switches with very small dimensions for front-mounting. The ones we are going to use are the PE series with 10 switching positions BCD.
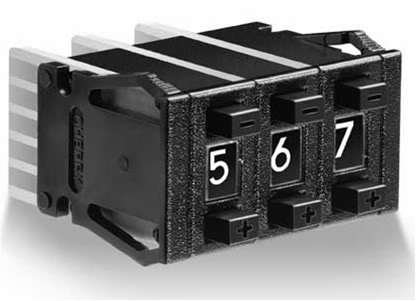
I have selected the Cherry PE C - A - 3 - 4 - 00 (4 digits BCD complete with end caps) and 3 spacers 609-0760 which gives me a total dimensions of 24x45 mm.
You may want to order also (2) stops 609-0013 to limit the first and last digit of your auxiliary tacan channel. Look at the Cherry catalogue for other options as illumination.
To set the Cherry pushwheel for realism you will have to dismantled under your responsibility the first digit to change the number strip to 0-1-0-1-01-…. and X-Y-X-Y-… for the last digit.
To connect each of the pushwheel to the PSCockpit System, go to I/O Layout page and select “16 to 4 BCD” inputs in a location with 4 consecutive inputs free:
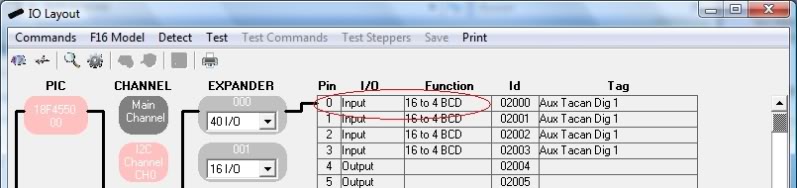
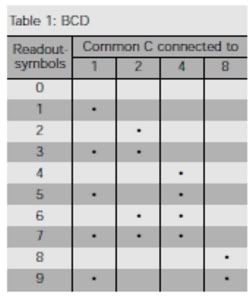
We have to wire each of the pushwheel as shown in the picture according to the pins selected in the IO Layout page:

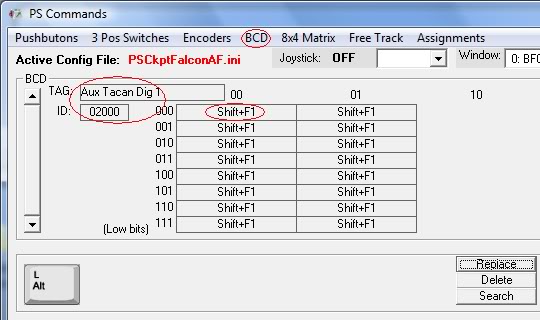
Once we have tested each of the pushwheels we have to put the commands to be sent to the sim. For this, go to the Commands page, select BCD, select the correct ID for each pushwheel and fill the matrix with the command that changes the Aux Tacan channel in your sim, in this case, for digit number one, Shift+F1.
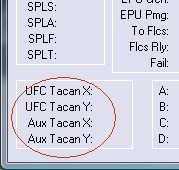
If you want to get your Aux Tacan channel in synchrony with the sim, go to F16 Model page, select Special I/Os, fill the data of the Aux Tacan channel and check the checkbox “Aux Tacan Synchro”:
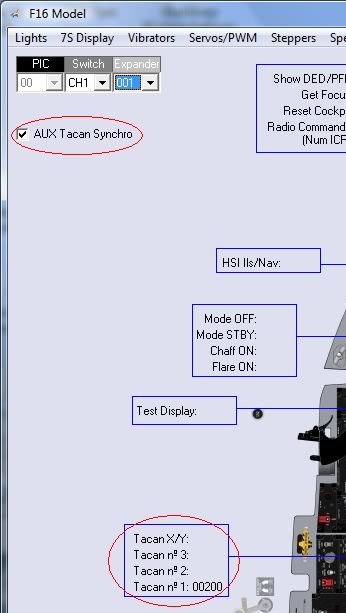
Now, when you enter the cockpit the tacan channel of the sim will display your cockpit tacan channel. Yihaaaaaa.
Regards,
Shep