
To use vJoy application for PSCockpit you must install the vJoy drivers in your computer. Please refer to http://vjoystick.sourceforge.net/site/ on how to download and install the vJoy device driver.
To use vJoy with PSCockpit you need PSCockpit Software v.1.0.3 or higher and firmware version v.1.0.3 or higher.
To check these versions, click on Help/About menu of the PSCockpit Software.
Refer to this page for latest updates:
https://psfalcon.blogspot.com/2015/05/pscockpit-system-up-to-date-software.html
Once you have installed the vJoy driver you must configure your VJoy devices. Typically, you will need to configure 3 devices for PSCockpit analogue expanders:
- ICP Rev.1 Analogue
- AUDIO1 Analogue
- AUDIO2 Analogue
To do this, open the “Configure vJoy” application and configure one device following the next procedure:
1. Select the device number
2. Select the desired number of axes. In PSCockpit you will need as much as five axes per digital expander.
3. Select the number of buttons. You can select maximum 32 pushbuttons to use them in PSCockpit.
4. Select “Enable vJoy”
5. Click on “Apply”. Be aware that vJoy will ask you to restart your computer, so you might want to configure also device 2 and 3.

Once you have configured your vJoy devices, you can click on vJoy icon of the PSCockpit main screen to configure the analogue and digital inputs to be used with it:

You will be warned about the faults encountered (i.e. wrong vJoy version), otherwise, if everything is correct, the vJoy configuration page will appear,
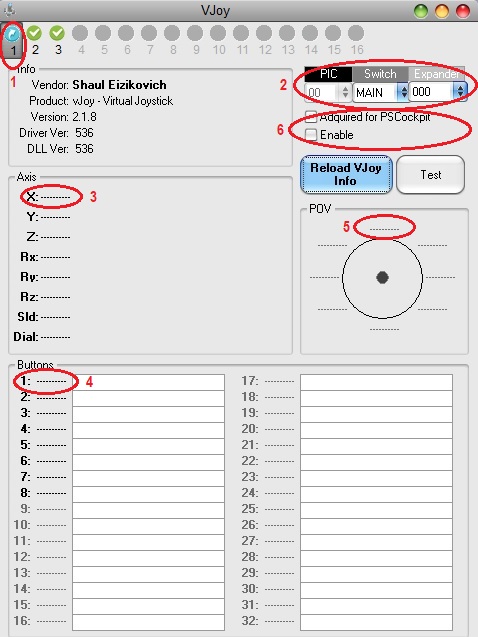
You can configure your PSCockpit analogue and digital inputs by following this procedure:
1. Select the vJoy device by clicking on the device number tab. They can appear in different states:
- Shaded icon: vJoy device is not available. You need to configure in “Configure vJoy” application. Please refer at the top of this document.
- Blue arrow icon: vJoy device is configured and free to be acquired for any application.
- Red cross icon: vJoy is configured and has been acquired for other application than PSCockpit.
- Green check icon: vJoy is configured and acquired for PSCockpit.
- Red cross icon: vJoy is configured and has been acquired for other application than PSCockpit.
- Green check icon: vJoy is configured and acquired for PSCockpit.
2. Select the I2C channel and expander you will use to assign inputs on vJoy.
3. Click on one axis label to display the dropdown list where to select the desire input. Available axis will be shown in bold, unavailable axis will be shown in grey.
4. Click on one button label to display the dropdown list where to select the desire input. Available buttons will be shown in bold, unavailable buttons will be shown in grey.
5. Click on one POV label to display the dropdown list where to select the desire input. Available POVs will be shown in bold, unavailable POVs will be shown in grey.
6. Check “Acquired for PSCockpit” and “Enable”. The device number icon should change to Green check icon indicating that this vJoy device has been acquired for PSCockpit.
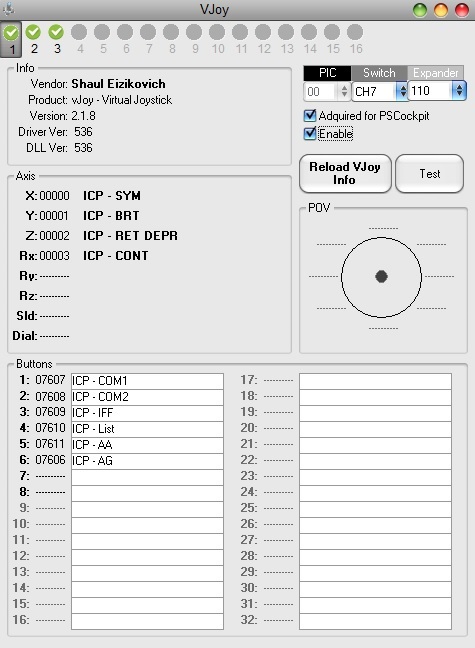
Once configured you will see the vJoy page, i.e. for the ICP panel:
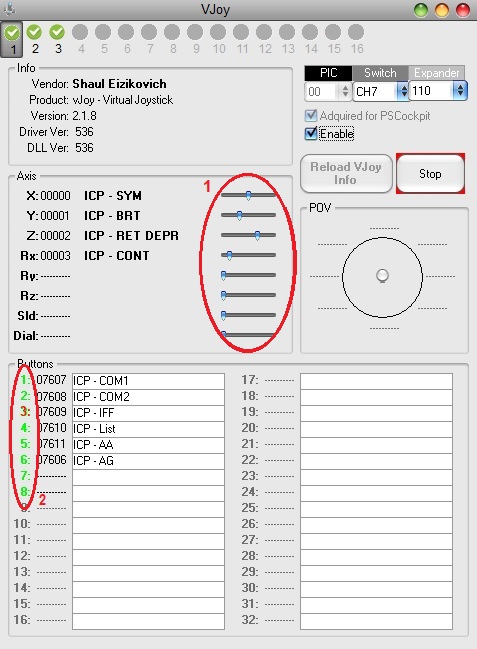
You will be able to test the interaction with vJoy by moving the Axis sliders (1) and clicking on the button number (2). Numbers in green shows the available buttons and numbers in red shows the button pressed.
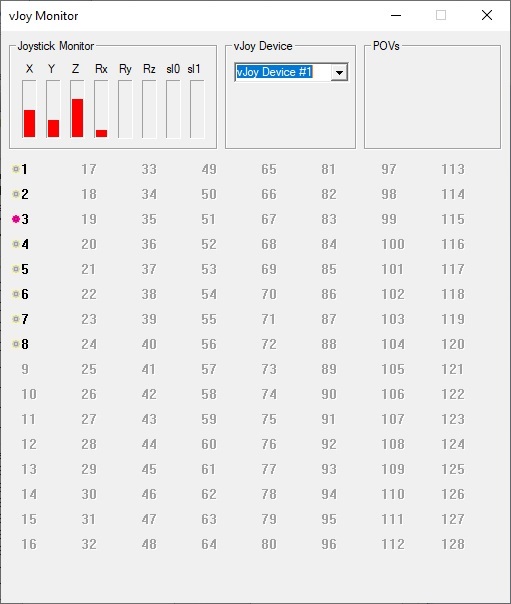
The interaction with vJoy can be seen by opening the “vJoy Monitor” application of vJoy:
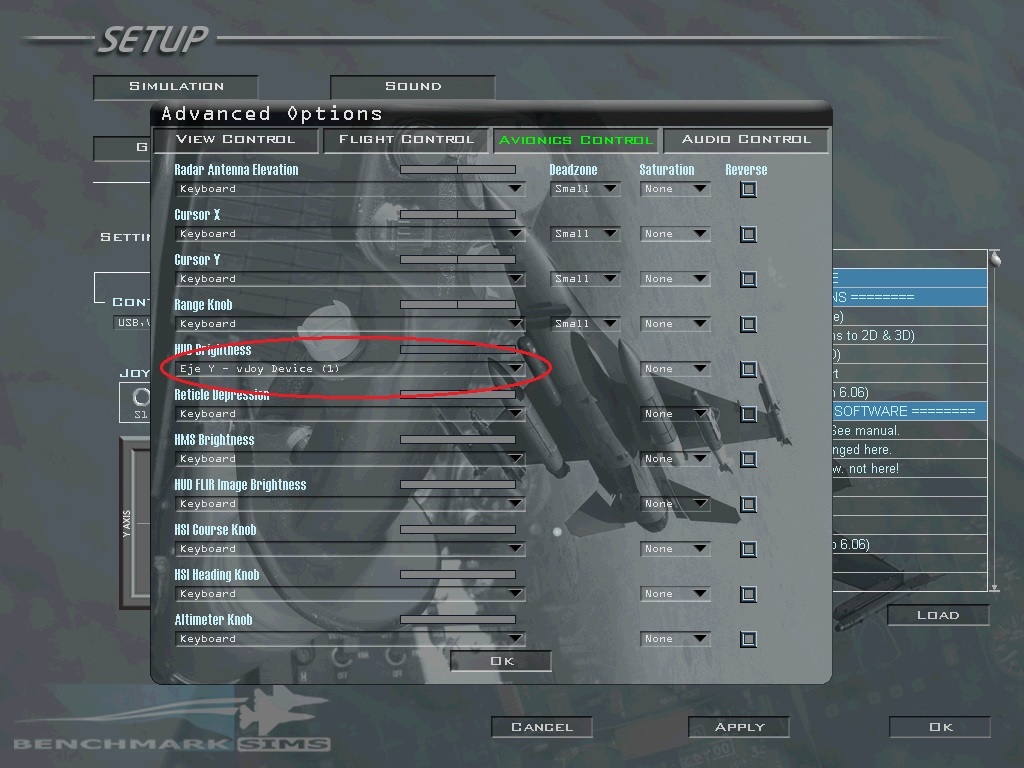
To finish the configuration of the vJoy device in your favourite sim, select the desire axis or DX button for a selected function. In case of BMS, go to Setup/Controllers/Advanced/Avionics Control:
Regards,
Shep
Is "Add Devices" done by opening the UI "vJoy Conf - Configure vJoy Devices" be done programmatically ?
ReplyDeleteIf so kindly provide steps or reference, that will be much helpful. Thanks